Choose a panel layout
Choose how seams divide the mould into cloth panels, then tune the controls that belong to that layout.
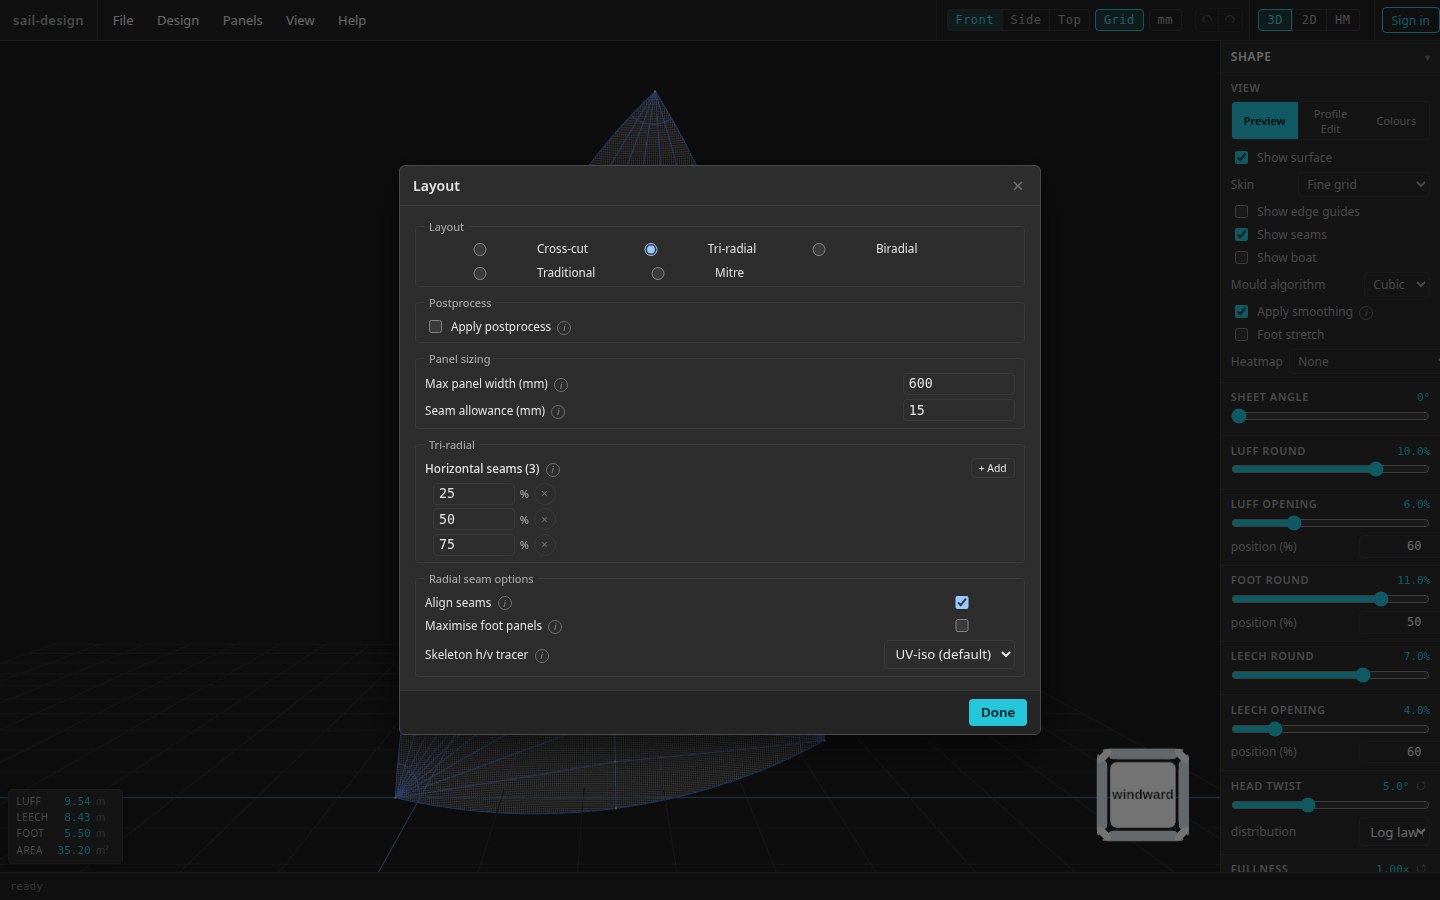
The Layout dialog shows common settings first and only the controls that apply to the selected layout.
- Five layout choices
- Common generation settings
- Settings for the selected layout
Compare the seam patterns
The choice changes both the preview seam network and the flat panels produced the next time you select Panels > Generate Panels.
| Layout | Pattern you will see |
|---|---|
| Cross-cut | A sequence of cloth-width strips placed from a configurable foot or leech reference. |
| Tri-radial | Horizontal bands with panels fanning from the tack, clew, and head. |
| Biradial | A lower clew fan and upper head fan meeting at one horizontal seam. |
| Traditional | Tack and clew fans below, horizontal middle panels, and a head fan above. |
| Mitre | A diagonal clew-to-luff seam separating two regions of strip panels. |
These rendered examples use the same preloaded Albin Vega 27 gennaker mould; only the selected layout changes.
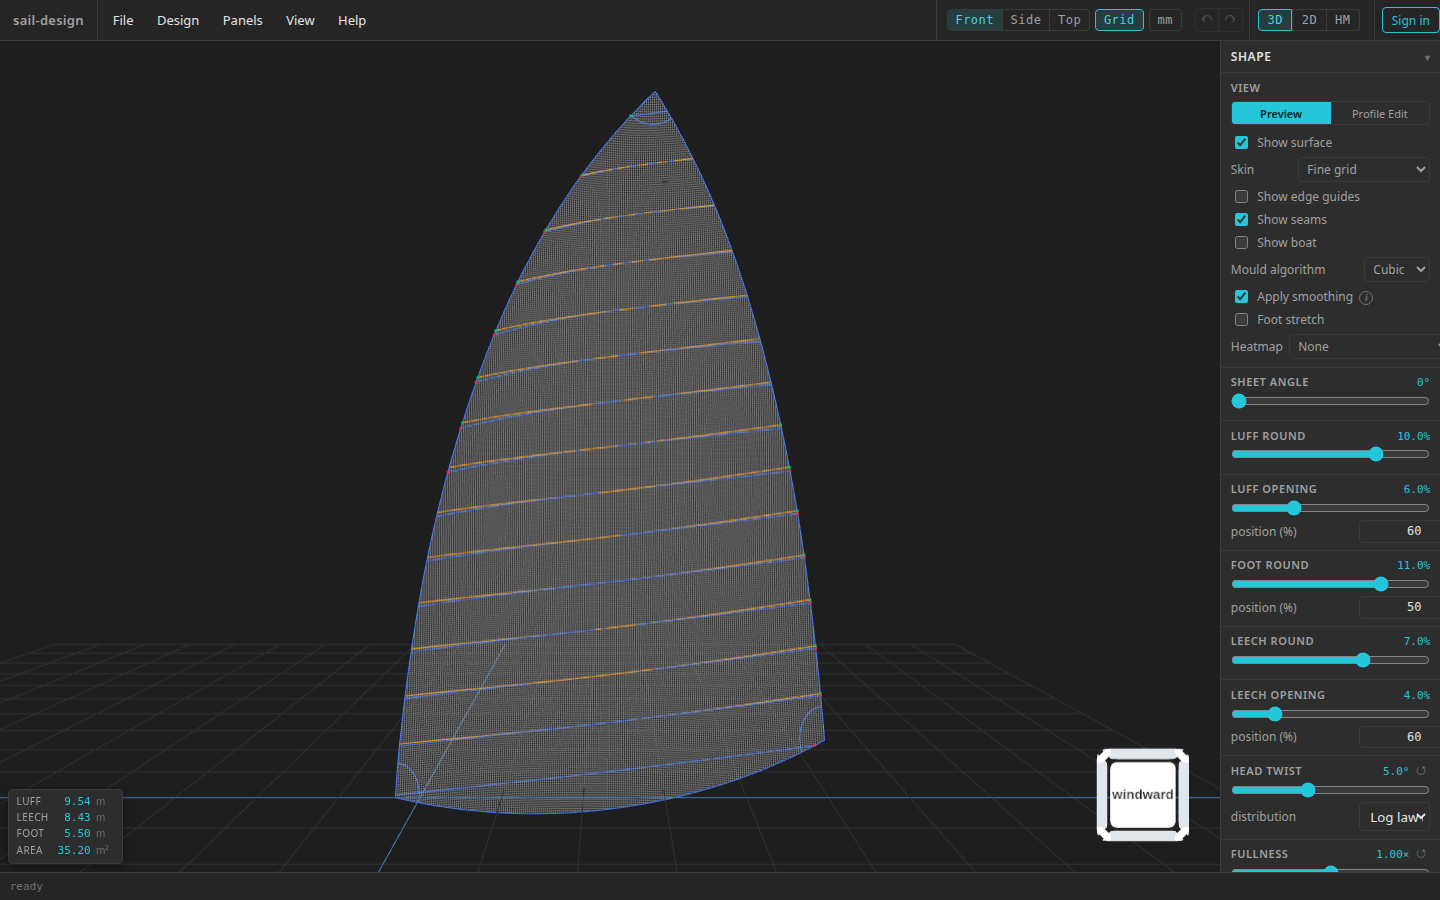
Cross-cut: successive strips span the sail from the selected anchor.
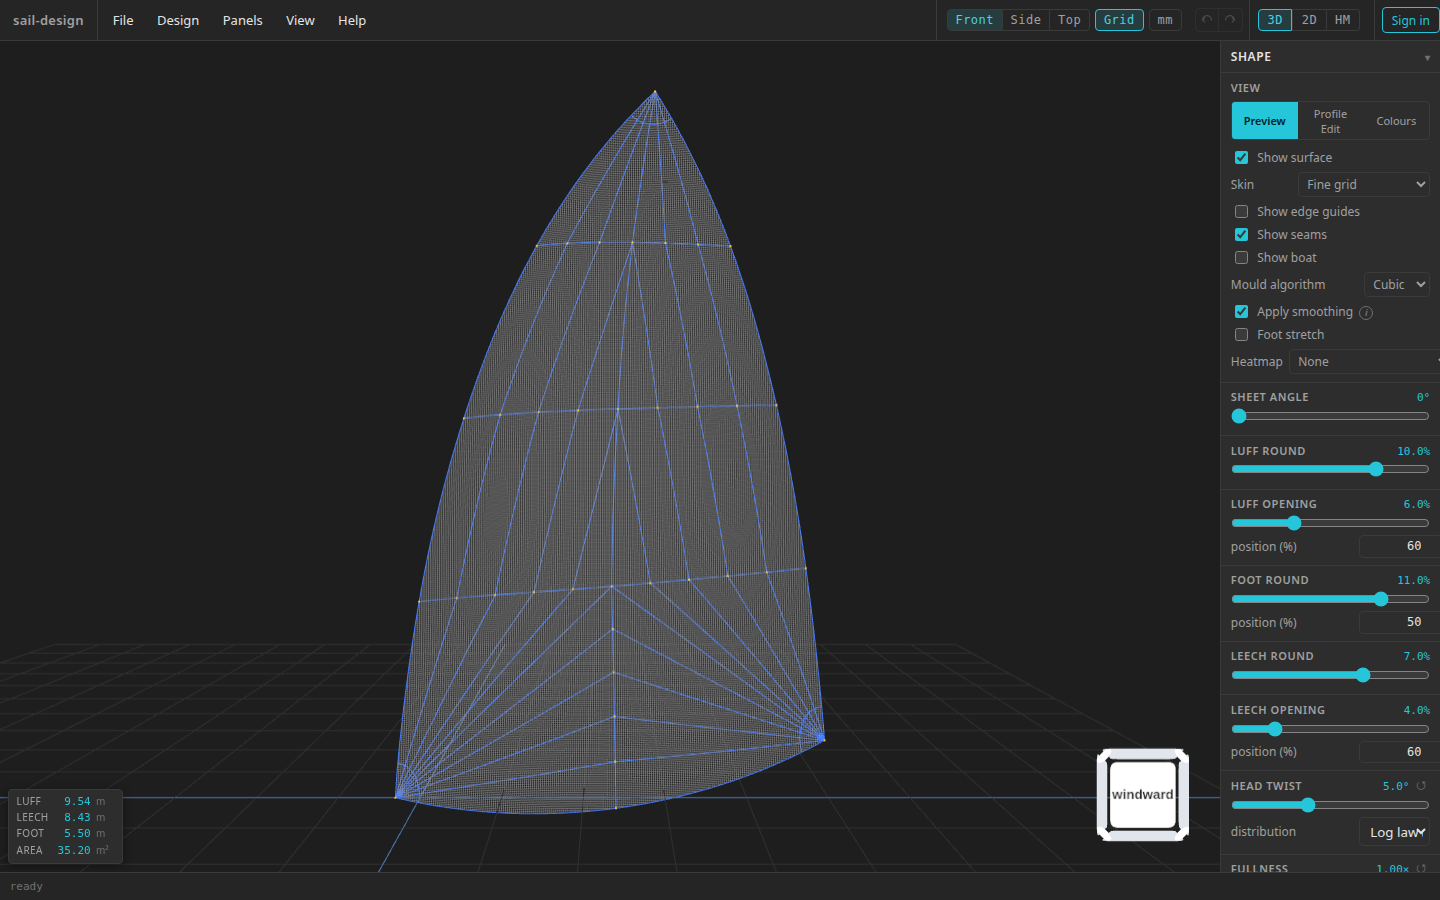
Tri-radial: horizontal bands connect the tack, clew, and head fans.
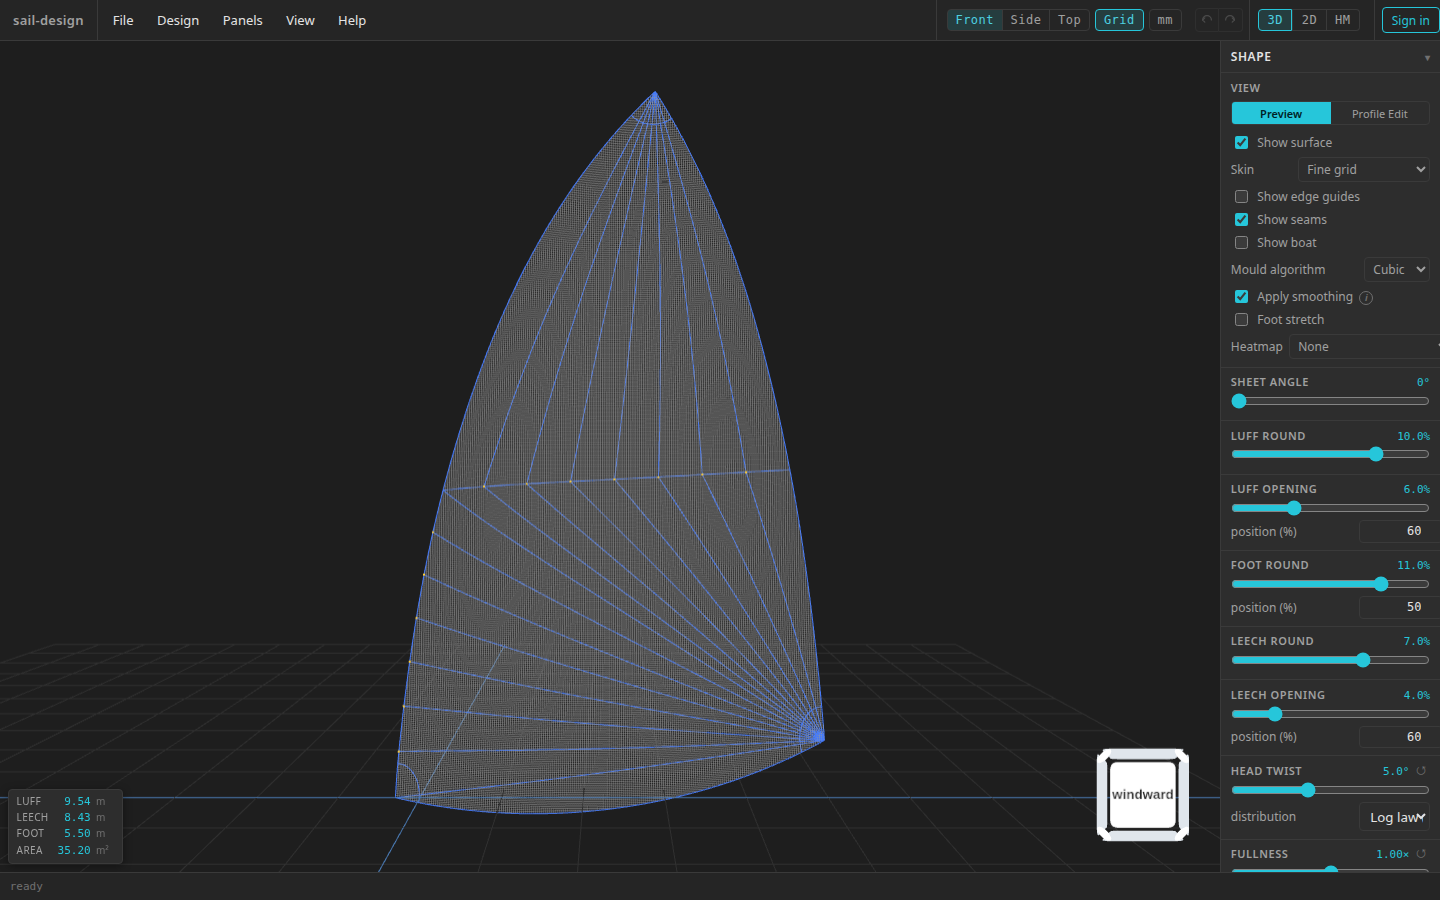
Biradial: two fans meet at one horizontal seam.
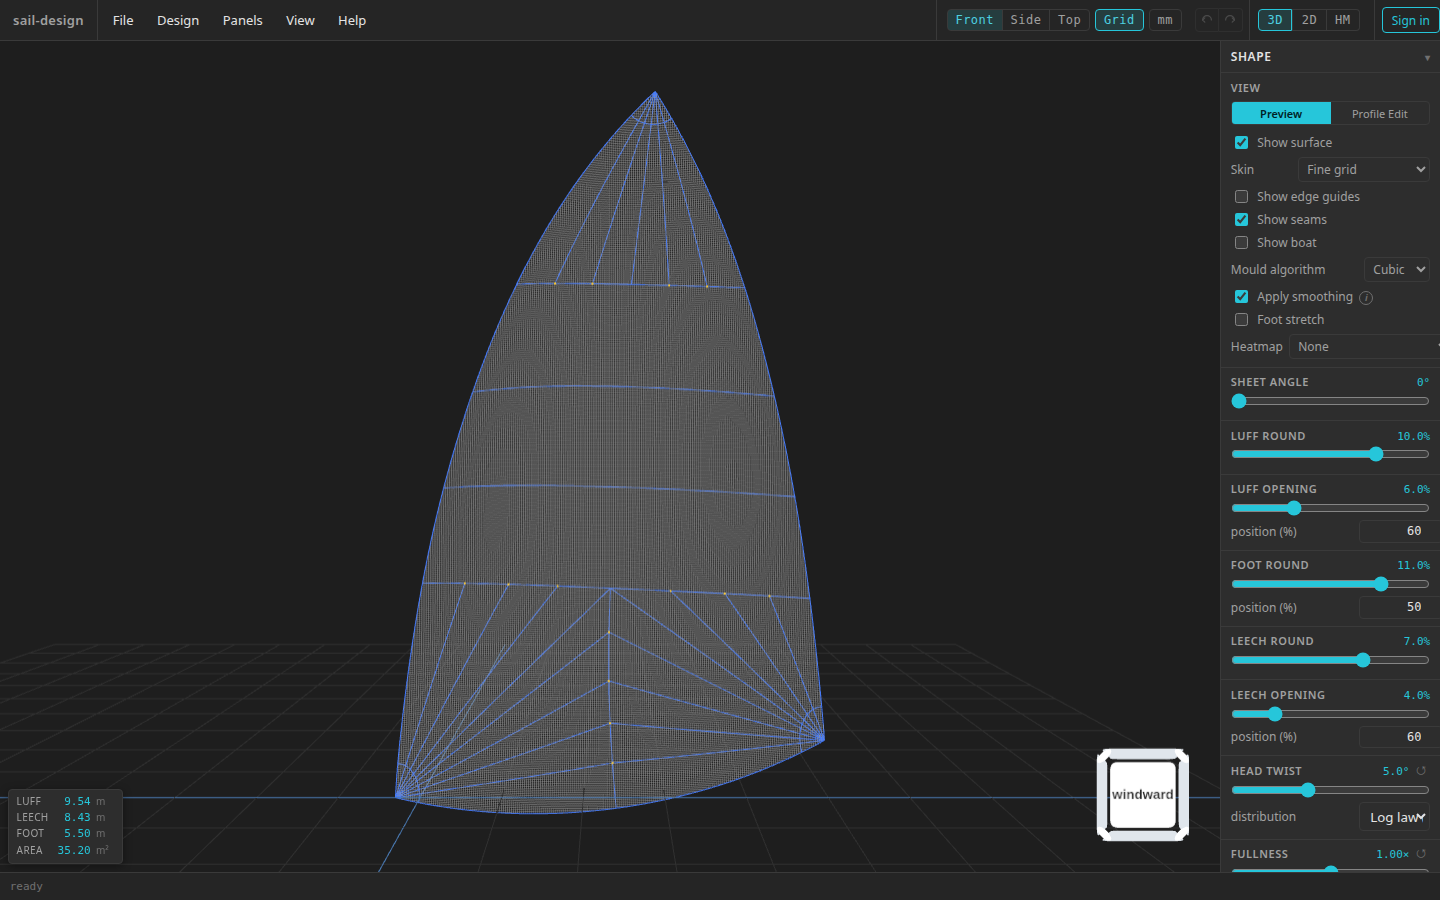
Traditional: radial corner regions surround a horizontal middle band.
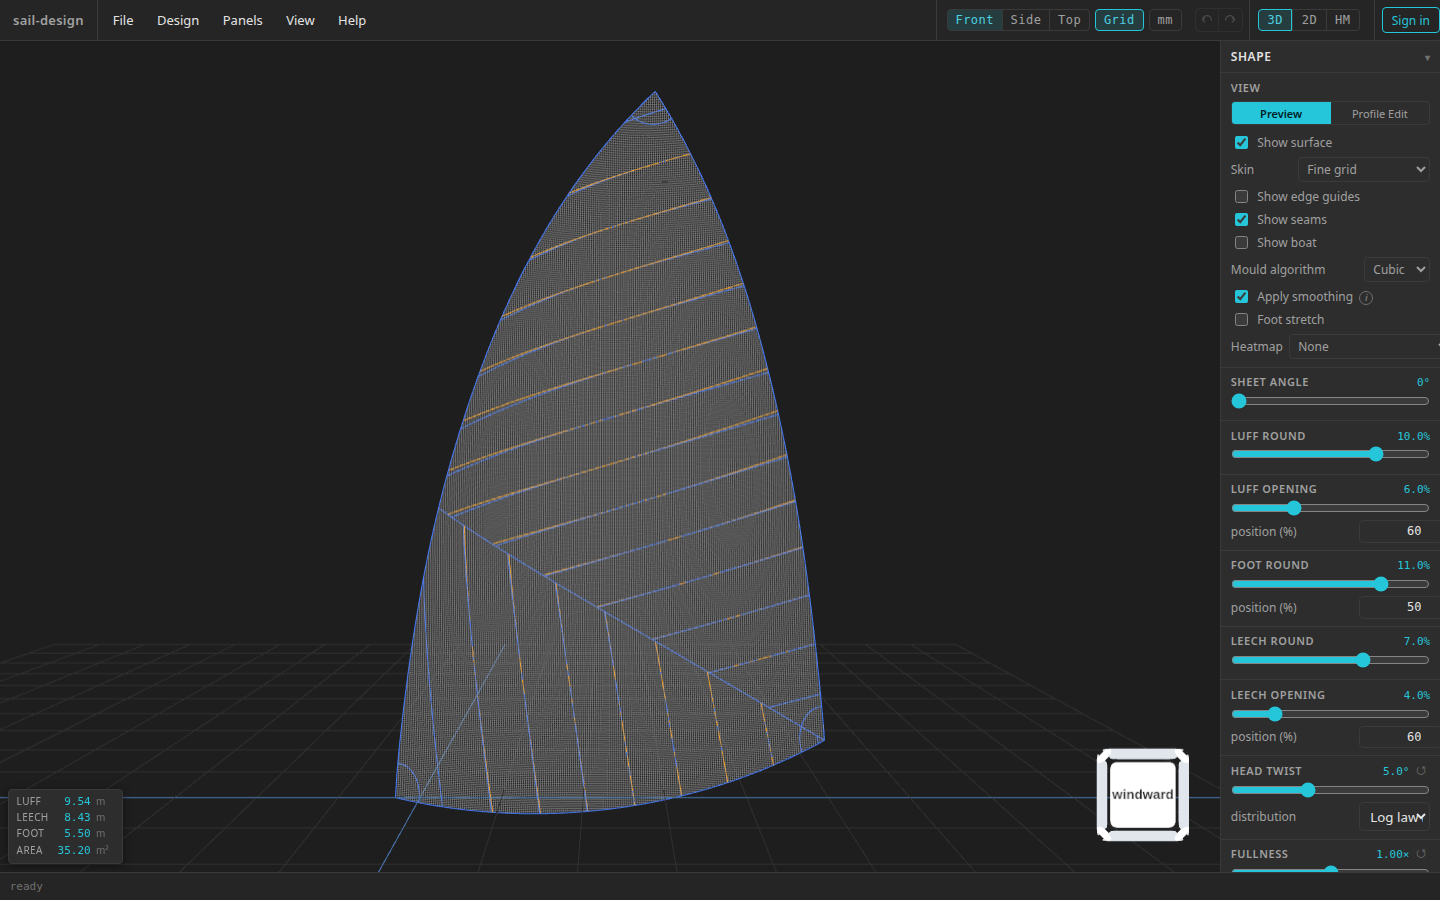
Mitre: a diagonal seam separates the foot and leech regions.
Set the common panel controls
The following controls remain visible for every layout:
| Control | Current range and effect |
|---|---|
| Max panel width (mm) | At least 100 mm and no more than roll width minus seam allowance. A smaller value generally produces more seam divisions. This control remains in millimetres even when the app displays sail dimensions in inches. |
| Seam allowance (mm) | 0–50 mm. Adds the entered width to the owned side of each shared panel seam; the sail's outside edges do not receive this allowance. |
| Apply postprocess | Off by default. Applies the experimental straighten-and-smooth pass the next time panels are generated. |
Changing roll width or seam allowance can silently lower an existing maximum panel width so the three values remain compatible.
Experimental postprocess
The in-app information popover marks Apply postprocess as experimental and warns about known output concerns. The choice is session-only and is not saved in the design file. It affects only the next Generate Panels request; the returned cut-edge geometry is then used by the panel viewer and the exports built from those panels. Generate again after changing the checkbox.
Configure Cross-cut
Cross-cut places a ladder of strips from one reference edge. Its controls are:
| Control | Current behaviour |
|---|---|
| Anchor edge | Foot (standard cross-cut) or Leech (leech weft tension). Changing to Foot also selects Parallel; changing to Leech selects Perpendicular. |
| Orientation | Parallel to edge or Perpendicular to edge. You can change the automatic choice afterwards. |
| Position offset (mm) | Shifts the reference strip. The input shows −2,000 to 5,000 mm in 50 mm steps. |
| Angle offset (°) | Rotates the reference strip. The input shows −30° to 30° in 0.5° steps. |
| Seam style | Broadseam top, Broadseam bottom, or Panel. See Seams and broadseam. |
The current typed-value handlers accept any finite position or angle, even beyond the bounds shown by the number inputs. If an extreme value cannot place a valid strip, generation or preview reports the resulting error rather than silently choosing another value.
Configure Tri-radial
Tri-radial divides the sail with one or more horizontal seams and constructs radial panels between them.
Place the horizontal seams
Each Horizontal seams value is a percentage along the luff and leech. A design must have at least one and can have at most 15. Each displayed input runs from 0.1% to 99.9%.
Select + Add to insert a seam halfway across the largest current gap. Select × to remove one; the final seam cannot be removed. On generation, the values are sorted and near-duplicates are combined.
Choose how fan seams meet
- Leave Align seams on for shared endpoints across the first horizontal seam.
- Turn it off to let the adjoining fans choose endpoints independently, producing T-junctions. This also locks Maximise foot panels on.
- Turn Maximise foot panels on while seams are aligned to redistribute the lower fan divisions toward the configured maximum width.
Choose the skeleton tracer
Skeleton h/v tracer offers UV-iso (default) and Surface-walk for the horizontal and vertical skeleton seams. Fan diagonals use surface-walk in both cases. Select Done and compare the rendered seam paths on your mould.
Configure Biradial
Set h1 height (%) from 0.1% to 99.9% to move the single horizontal seam where the clew and head fans meet. Align seams and Maximise foot panels have the same shared-endpoint and width-distribution behavior described for Tri-radial.
Biradial availability
Biradial is disabled when Foot opening is 90° or more. If an existing Biradial design reaches that condition, the app changes its layout to Tri-radial.
Configure Traditional
Traditional exposes four controls for its horizontal middle band:
| Control | Current behaviour |
|---|---|
| Number of mid-band panels | The input displays 1–20 whole panels. Generation also limits the resulting band to the available middle height. |
| Horizontal max panel width (mm, blank = fill cloth) | Blank uses roll width minus seam allowance. A positive value sets a smaller explicit cap. The common maximum still controls the radial corner fans. |
| Bottom fan section (%) | 5–60% along the mould's middle path from the foot. |
| Mid-band seam mode | Mixed (minimum cutting) gives the top middle panel two straight long edges; All curved tops (uniform aesthetic) gives each middle panel a curved top and straight bottom. |
Configure Mitre
The diagonal mitre seam runs from the clew to the luff and divides the layout into Foot region and Leech region strips.
- Mitre luff position (% up luff, blank = bisector default) accepts 0–100% or an empty value.
- Each region has its own Position offset (mm) and Angle offset (°). The inputs display −2,000 to 5,000 mm and −30° to 30°, but their current typed-value handlers accept any finite number.
Select Done to close the dialog and start a fresh seam calculation.
Checkpoint
The old overlay clears immediately, a loading indicator appears while the new seams are calculated, and the selected pattern replaces it. This is still a preview; flat panels do not exist until you choose Generate Panels.