Make your first sail
Complete one sail from File > New to a downloaded panel DXF. Along the way, you will see which work stays in the browser and when the panel service and a free account become necessary.
The path is:
Boat and sail → shape → layout and seams → save and reopen → generate and inspect panels → sign in and export.
Orient yourself in the workspace
The app initially shows a ready-made example. Use it to find the four areas you will use, then start your own design in the next step.
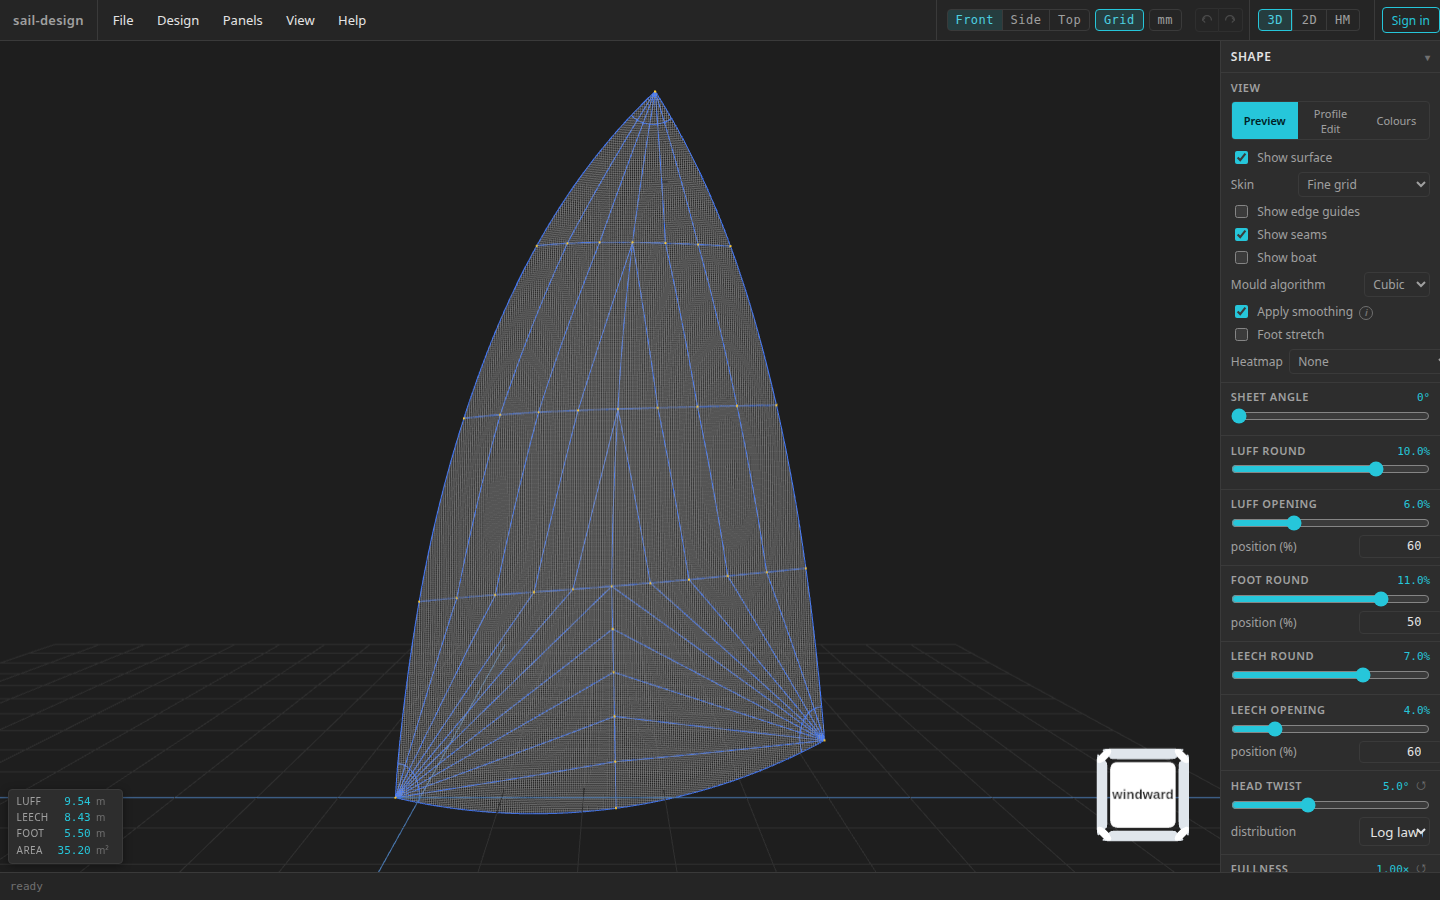
This preloaded Albin Vega 27 gennaker is already two choices into the workflow. The walkthrough starts again with File > New.
- File, Design, Panels, View, and Help menus
- Live sail workspace
- Shape and layer controls
- Status and saved filename
- The menus start, save, configure, generate, and export a design.
- The large centre workspace shows the current 3-D, 2-D, or Heatmaps view.
- The Shape card makes quick visible changes and controls preview layers.
- The bottom status changes from updating... to ready, and later shows the saved filename or generated-panel count.
Use 3D, 2D, or HM at the top right to change the canvas mode. The walkthrough stays in 3D, but those same buttons remain available throughout a design.
Create and shape the design
Start with File > New
Open File > New. In Step 1, leave Albin Vega 27 selected. Its summary shows the rig dimensions and Hull trace: yes. Select Next →.
In Step 2, select Gennaker. The other cards are also available; this choice only defines the worked example.
Checkpoint — the design is ready
The dialog closes, the status returns to ready, and Show seams is selected in the Shape card.
See Boats and sail types for the other starting choices and their initial layouts.
Make a visible shape change
In the right-hand Shape card, find Luff round. Drag its slider from 10.0% to 6.0% and release it. Wait for the status to return to ready.
Checkpoint — the preview changed
The left edge of the sail is less rounded. Show seams clears because the old seam overlay no longer matches the changed shape.
For precise dimensions and the rest of the shape controls, continue later with Rig and dimensions and Profiles and fullness.
Choose Cross-cut and refresh the seams
Open Panels > Layout, select Cross-cut, and leave the other settings at their starting values. Select Done.
Checkpoint — Cross-cut seams are visible
After the seam calculation finishes, Show seams is selected again and the preview shows a stack of crosswise seam curves.
The Choose a layout and Seams and broadseam guides own the optional construction settings; they are not needed for this walkthrough.
Save and reopen it
Save a local design file
Open File > Save. Choose a location if the browser opens a save picker; in browsers without that picker, keep the downloaded JSON file.
Checkpoint — the app shows the filename
The bottom bar shows a name ending in
.jsonwithout an unsaved-change dot. The design itself is not autosaved to browser storage or to a cloud account.Open the file you just saved
Open File > Open and choose that JSON file.
Checkpoint — saved choices return
The Luff round readout is 6.0%. Cross-cut remains selected in Panels > Layout, and its seam overlay is calculated again automatically.
Keep the JSON file
Saving creates the copy you can reopen. Closing a design without saving leaves no recoverable cloud or browser-storage copy. The app warns before discarding known unsaved changes, but that warning is not a backup.
Generate and inspect the panels
Run Panels > Generate Panels
Open Panels > Generate Panels. Keep the tab open while the status reads generating panels....
Checkpoint — a panel count appears
The status changes to panels: N, where N is the generated count, and Panels > View Panels becomes available.
Open Panels > View Panels
Open Panels > View Panels. The full-screen panel viewer replaces the sail workspace.
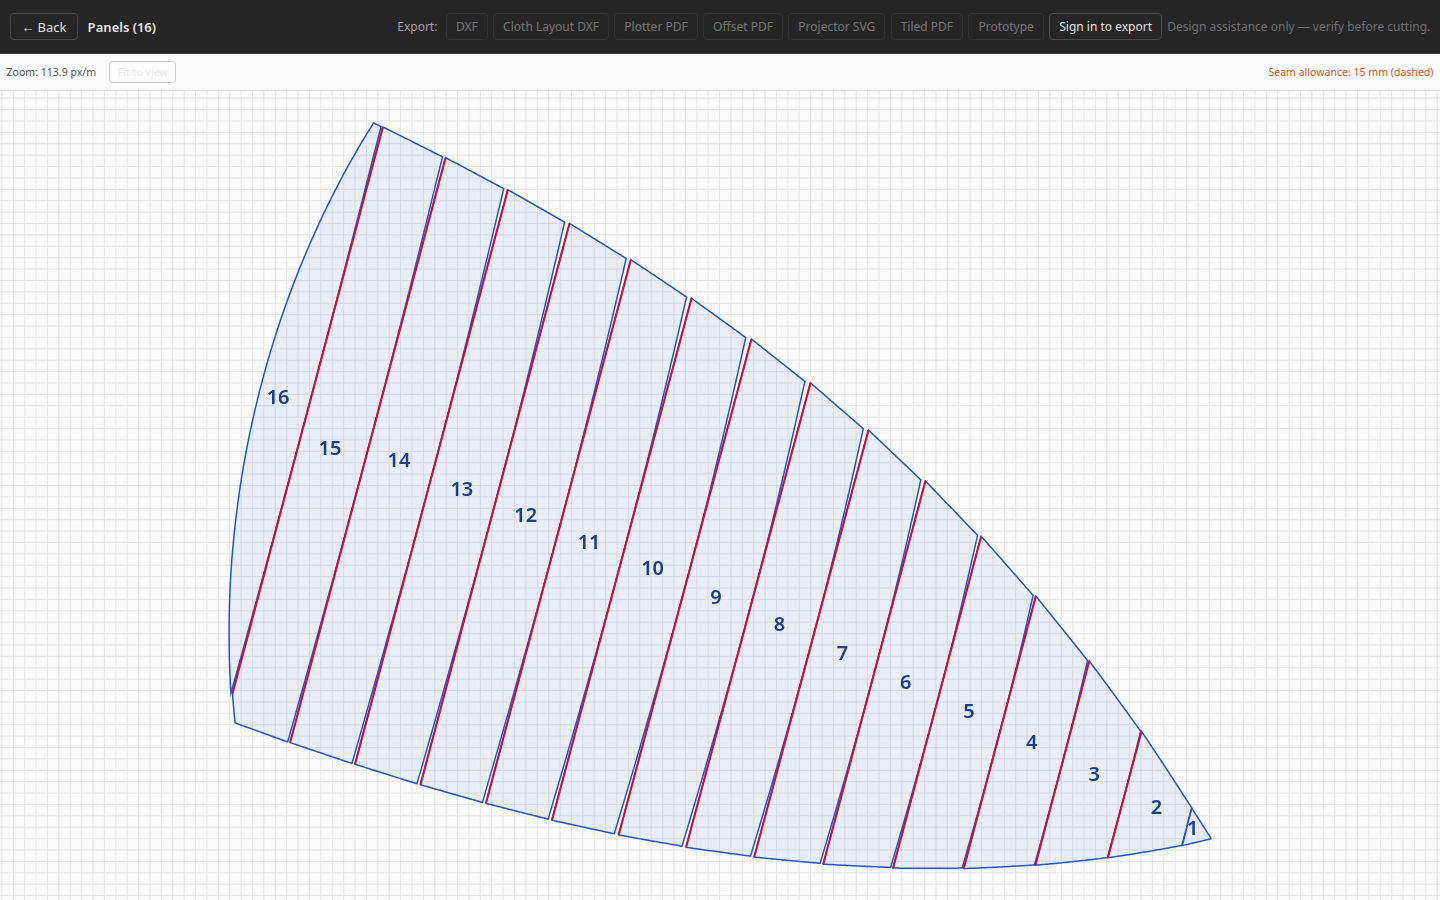
The reproduced walkthrough generated 16 cross-cut panels. A future geometry change may produce a different count; the success signal is the panels: N status and this viewer opening.
- Generated-panel count and Back action
- Export actions and sign-in boundary
- Numbered flattened panels
- Configured seam allowance
Checkpoint — flattened panels are open
The header reads Panels (N) and each flattened panel has a visible number. Use ← Back to return without losing the generated set.
Sign in and export a DXF
Select Sign in to export
In the panel viewer, select Sign in to export. Enter your email, read and accept the required cutting-responsibility acknowledgement, then select Email me a link.
Open the single-use link from the email. The new tab confirms that you are signed in; return to the tab containing your design. Your email appears in the top bar and the viewer's export buttons become available.
Checkpoint — the account is active
The Sign in to export action is gone and DXF is enabled.
Download the panel DXF
Select DXF in the panel viewer's export toolbar.
Checkpoint — the first export is complete
The browser downloads
panels.dxf.
What stays local, and what uses the service
| Task | What happens |
|---|---|
| Shape, inspect, and preview seams | Runs in the browser; no account required |
| Save and Open | Writes and reads a JSON file on your device; no autosaved design copy |
| Generate Panels | Uses the online panel service; guests can generate |
| Download an export | Uses the online export service; free account required |