Seams and broadseam
Use the seam overlay to inspect the current layout on the 3-D mould, then choose how a Cross-cut panel's straight and shaped edges are assigned.
Preview seams are not generated panels
The blue seam network is calculated in your browser and drawn on the current 3-D mould. It lets you inspect a layout without signing in or contacting the backend. It does not mean the panels have been flattened or stored for export.
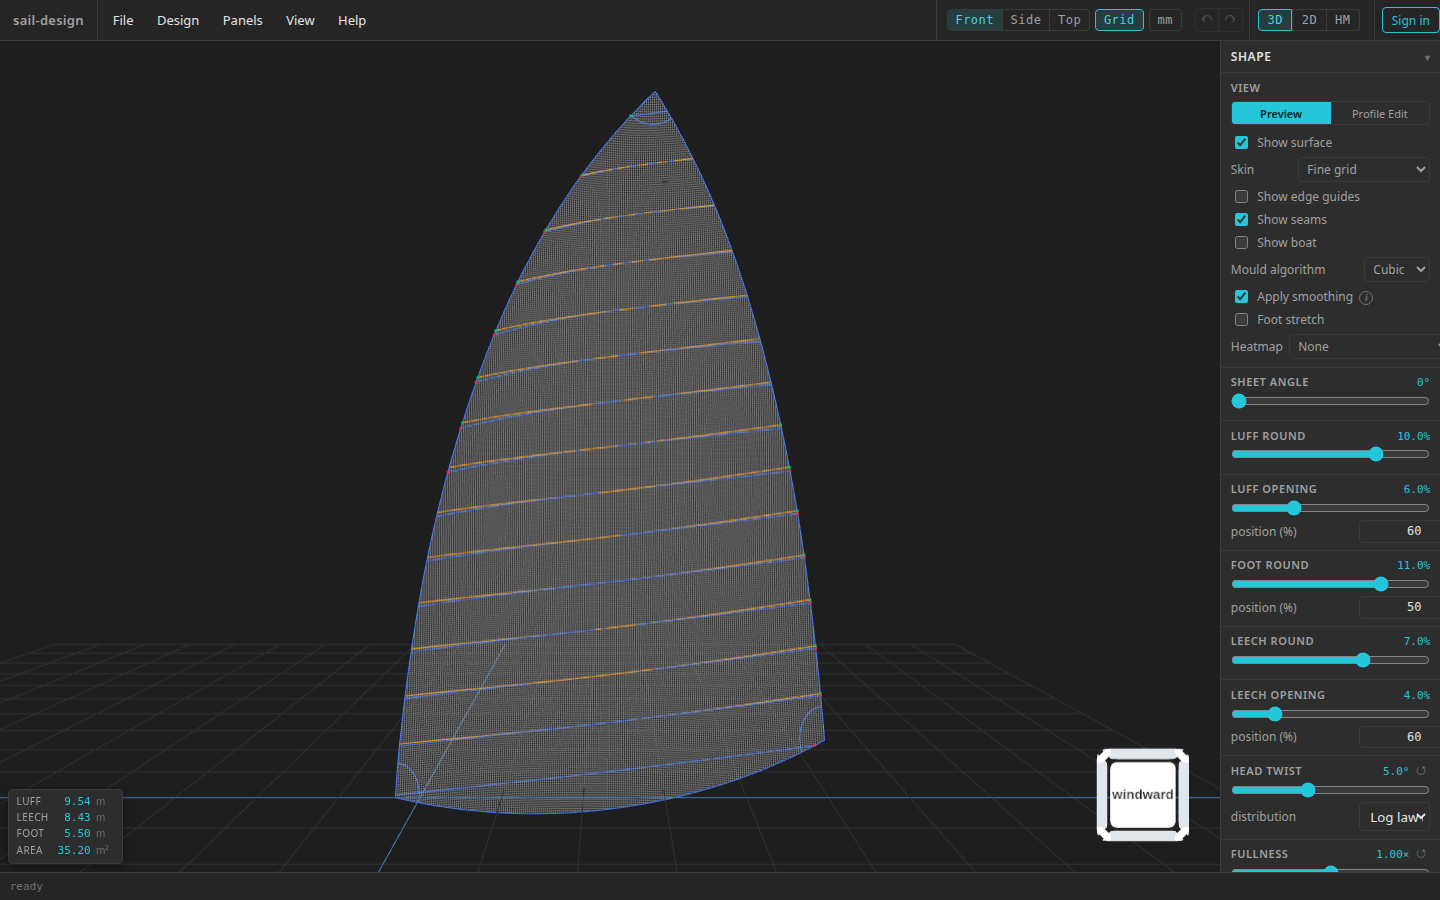
A Cross-cut preview can show both physical curves that meet along each intended seam. Generated flat panels remain a separate step.
- Cross-cut seam overlay
- Show seams remains enabled
When the overlay is calculated
The app calculates seams in these situations:
- on the initial app load;
- after File > New or a successful File > Open;
- when you turn Show seams on; and
- when you select Done in Panels > Layout.
A loading indicator appears while the calculation runs. Turning Show seams off removes the current curves without changing the selected layout.
Why the overlay can disappear
The app clears the overlay as soon as an edit could make it stale. This includes changes to sail shape, fullness, cloth, construction settings, or layout. Changing Sheet angle does not clear it because that control rotates the sail and its seam curves together.
To refresh after an edit, turn Show seams on or open Panels > Layout and select Done.
Checkpoint
The old curves disappear first. When calculation finishes, the replacement network matches the current mould and selected layout.
What broadseam means in this app
At a Cross-cut join, one panel edge can remain a straight cloth-roll edge while the matching edge on its neighbour carries the shape needed for the curved mould. The shaped edge is the broadseam edge.
This is separate from Seam allowance:
- broadseam describes the shape assigned to the two matching panel edges;
- seam allowance adds extra cloth outside the cut curve on one owned side of a shared seam; and
- luff, leech, foot, and head boundaries receive no panel seam allowance.
Choose the Cross-cut seam style
Open Panels > Layout, select Cross-cut, then use Seam style.
| Seam style | Straight edge on each strip | Shaped edge |
|---|---|---|
| Broadseam top | Bottom edge | Top edge |
| Broadseam bottom | Top edge | Bottom edge |
| Panel | Neither long edge is declared straight | Both long edges follow the centred panel curves |
“Top” and “bottom” follow the direction in which the strip family progresses from its anchor. On a rotated strip layout, they do not necessarily mean the top and bottom of the screen.
Select a seam style
Choose the edge assignment you want and select Done. Broadseam top is the current default.
Inspect the refreshed overlay
Wait for the loading indicator to clear. Cross-cut shows the paired curves in blue and amber so their separation can be inspected on the mould.
Generate fresh panels
Choose Panels > Generate Panels after changing the seam style. Existing generated panels are not rewritten by a preview-only change.
Checkpoint
Open Panels > View Panels after generation. The flat panel edges now reflect the selected straight/shaped assignment.